Friday, November 23, 2012

Happy Thanksgiving!

I hope everyone had a Happy Thanksgiving and had a chance to spend the day with friends and family.

Our Thanksgiving was small this year. Just us, my mother and father-in-law, and two dear family friends who didn't have family to spend the holiday with. As usual, I spent the day being ill. It seems that every holiday, I spend most of my time laying in bed being sick. I missed out on Thanksgiving dinner (I had a small bit of mashed potatoes and a roll) but didn't have any of my favorite foods that I spend a year waiting for. The sweet potatoes were consumed within minutes, so I don't even have leftovers to enjoy. I suppose that is a great excuse to have a little Thanksgiving meal prepared later. Nonetheless, I am still very thankful for everything in my life. I may not have gotten the opportunity to sit down to a meal with my family yesterday, but I am lucky enough to have meals with my family every day. We are very blessed, indeed.

I haven't been very busy in the sewing room lately, although I really should be since Christmas is coming up! I have been making lists and deciding what to make for everyone, but that's about as far as I've gotten. I did get caught up on my bee blocks which I was stressing about, so that's good.


This is one of my two blocks for September. These were horribly late and in my rush to finish them, I forgot to get a photo of the second block.


And these are my two blocks for November. Both ladies from September and November wanted improv pieced blocks. They are not my favorite to make and I really struggle with them. But I think they turned out okay anyway.

I also purchased the 241 Tote pattern from noodle-head.com about a week ago and I made myself a pretty cute bag. The pattern was super easy, and she does a great job of explaining how everything goes together. She has several really awesome free tutorials on her blog too. You know, in case you're wanting to put together your own list of things to make for Christmas =)

This is the (almost) finished 241 tote that I made. I did finish it, but I accidentally deleted the pics I had on my computer of the finished product and I'm not quite up to taking more pictures right now.
I really love how it turned out and I have been using it everyday.


Sunday, August 12, 2012

A Day Late

I know in my last blog post I told you to check back the next day (yesterday) to see what I've been working on lately. The post is a day late though because I got a bit distracted by being offered a JOB!!! A job I didn't even apply for, and the best part? It will be the first job I've ever had that didn't require a food handlers permit =/ I'll have a desk and everything. Plus, no customer service. So that's a definite plus. ANYWAY... on to the actual post =)

First up is my Pay It Forward gift for Christine. I have made several things for her already, so I wasn't sure what to send her for this. I decided on a ruffle clutch and I really hope she likes it. If not, she has an adorable little girl who might like it for dress-up =)

Here's a picture of the inside. I like the little pocket and I'm thinking I might make one for myself.


A friend of mine is having a birthday soon. She loves comic book characters, especially Wonder Woman. I made another version of this clutch using a fabric with Super Women on it. This time I made it without the ruffle, as this friend is slightly less "girly"...


Without the ruffles or the wrist strap, I think it makes a great oversized wallet.


My dear friend, Lizze, and I have a monthly swap that we do together. Up until last month we have both been really good about getting our stuff done and sent off. July was a little crazy for us both though and I didn't get my swap item out in time. We decided on swapping pillow covers and I though a Swoon block would make an awesome pillow.

Here's what I came up with. I never did get a picture of the finished pillow cover, but I quilted it and used a black Kona on the back. I also made her a little zipper bag and a set of 3 magnets for a belated birthday gift, which I did not get a picture of.


I have been having a hard time keeping up with sewing obligations lately and I wonder how I'll ever keep up working full time outside the home. I will just have to say no to swaps, I suppose, and sew for the shop or myself when I have spare time. How do you juggle work, kids, housework, and sewing?!?!


Friday, August 10, 2012

Summer Fun!

For our family, summer is a time of relaxing and spending time with loved ones. When the kids are teenagers I'm sure they won't enjoy family time quite as much so I have to take it while I can! This summer we have had MANY adventures (which is why my blog has been so quiet lately). My kids have been to Idaho, Oregon - twice, and to the lake many times. Also... BBQ's and parties galore!

Camping trip to Soda Springs

Sara and I at a barn party/Alice's birthday

Canoeing at Moses Lake

Me in my "mothership"


Playing at the campgrounds

And a really cool trick for making omlettes that I learned from my sister-in-law! These are great for camping. Slice up your veggies and meat (I used mushrooms, green peppers, tomatoes, onions, and ham). Write your name on a quart sized freezer ziploc bag using a sharpie. Put all your omlette ingredients in the bag, then crack desired amount of eggs in to bag. Squeeze the air out and seal the bag. Squish all the ingredients together and then set your bag in a pot of boiling water. The more eggs you use, the more time it takes to cook, but ours took about 15 minutes. Omlettes for everyone, just the way they like them! We also set out toppings like cheese, sour cream, and salsa. Yum!


I could have shared a ton more photos with you, but you get the idea. We've been keeping busy and having fun. The summer comes to an end with the start of school on August 28th so we are trying to cram as much in as possible.  I have actually had some time to begin sewing again a bit - and I have pictures to prove it! Come back tomorrow and I'll share what I've been working on.

Monday, August 6, 2012

Giveaway Winner!

I promised to post the winner for the 2 pack of patterns from Two Peas in a Pod, and although I am a bit late (as usual) I have a winner today!

I used the Random Number Generator on random.org and the winner is...


Lucky # 8, Carla, said:

Very cute bag! :) I like the St Mary Backpack! :) Thanks for a chance to win! :)


Thanks, Carla. I'll be sending an email to you for your contact info and pass it onto Trish so she can send your patterns!


Tuesday, July 24, 2012

Pattern Review - and a Giveaway!!!

The lovely Trish Preston from Two Peas in a Pod Designs gave me the opportunity to review one of her adorable patterns. Her patterns are so darling and I love her designs, but had never tried one. I jumped on board with this one and was very excited to give it a try.

I got to choose my pattern, and honestly, I had some hesitation. I was going to play it safe and choose a pattern that did NOT involve zippers in any way, shape, or form. But in the end I chose a pattern that included not one, but TWO zippers!

This is the pattern that I chose. Cute huh?!


I was pleasantly surprised when I got the pattern in the mail. When I opened it up, it was full of full-color photos of her step-by-step process. It was like an online tutorial, but in paper form. Also included were full sized templates.

My original plan was to make this case using my beloved chicken fabric (I love it!!!). But once I trimmed the front pocket piece down and went to unzip the zipper halfway, it stuck a bit and I pulled too hard, so this happened:


I really wasn't thinking when I put the zipper in, and the instructions don't tell you to, but I highly recommend just doing a little straight stitch at both ends of the zipper so this doesn't happen to you! The ends of zipper are frayed (as you can see in the above photo) because I attempted - in vain - to save it by putting the zipper pull back on. I didn't work so I scrapped this project and started over.


In the end, this is the adorable bag that I ended up with. All the kids love it and they have each requested one of their own. I love this pattern and it makes such a cute bag. And the awesome thing is that it gives you instructions and templates for 3 different sizes.

I do have one small complaint about this pattern. Despite Trish and I e-mailing multiple times back and forth, I never was able to figure out the order I was supposed to layer my fabrics to get the linings and backing fabrics in the correct places. In the pattern, Trish used the same fabrics for the inner lining, and the front zipper pocket lining. I suppose if I had done that, I wouldn't have had this problem. But with the photos in her pattern, I couldn't tell which one was supposed to be the inner linings, and the lining for the front pocket. I kept feeling like I was missing a step somewhere, even though I wasn't. I still ended up with a super cute zip bag though, and when I make it again, I will just use the same fabrics for all the linings and the backing.


The white fabric was supposed to be my inside lining, and the backing fabric shown in the bottom photo was supposed to be the lining for the zipper pocket shown in the top photo.


Overall I am pleased with the finished product and I will definitely be using the pattern again to make a few more!


Now for the giveaway part!!! Trish has kindly offered to give one reader a surprise 2-pack of her patterns. Isn't that great?! She has so many wonderful designs, and one lucky person will win 2.


As much as I would love you to follow my blog, I'm not going to make that a condition for you to win (but you should still totally do it anyway, hehe.) All you have to do is visit Trish's website HERE then come back to this post and leave a comment telling me which of her patterns you would love to win. That's it! The winner will be chosen via random number generator on Wednesday, July 29th.

Good luck!


Wednesday, July 11, 2012

It Worked!!!

I don't know what I did, but the problem I had with my photos seems to have miraculously fixed itself. I'm pretty excited to be able to write a post today after my little hiatus from the internet.

Before I moved, my summer was pretty lazy and relaxed. Now that we live near family again, I am finding that summer is no longer as relaxing as it once was. Every weekend has been filled with parties, guests, and BBQ's. Not that I am complaining. It has been great. But it hasn't left much time for me to keep up with everything else! I have spent most of my free time sewing in order to keep up with the farmers market. Wanna see?!?! Yes, I thought you might.

Here's my Washi Tape Kindle Fire sleeve. And I just heard this fabric line has been retired! I love it so much and I'm so glad I was able to get some recently. I'll definitely be using it selectively until it's gone.

And a Nook Tablet sleeve. I made this one for a custom order, but my customer never came to get it. From now on I think I'll be asking for at least a partial payment in advance.

I have been loving making these key fobs! I rarely throw scraps away and I have been able to really start using up some of them!


I've been making a ton of zipper bags too.

And some super cute cross body bags!

Lots and lots of market bags


And a couple of pretty awesome pincushions =)

In between all of this sewing we have been camping, boating, and having birthday parties. I also worked on a secret project reviewing a pattern for Two Peas in a Pod Designs and I'll be having a giveaway in a couple of weeks! Yay!!!


Attempting To Write a Post...

I had every intention of finally sitting down to write a LONG overdue blog post today. I also had every intention of listing all of the items I have recently taken pictures of. I plugged my media card into my computer, resized and edited all my photos, and BAM! They are all missing now. Don't know where they went, but I hope I can figure it out. Otherwise I'm off to buy a new media card and retake about 75 photos *sigh* If anyone has experienced this issue, please let me know if/how you were able to fix it!!!

Monday, June 11, 2012

Yes, I Am An Artist Too

No photos or anything to share today. Just a little something that has been bugging me lately and I wonder if anyone else has thoughts on this topic.

You may or may not know, that for the last several weekends I have had a booth set up down at our local farmers market. I did not originally plan to take large quilts down there. I wanted to have small items (bags, small quilts, etc.) that I thought would sell better. My husband convinced me to take my big quilts as well; not because he believed they would be big sellers, but because he thought it would help advertise the things I can do.

I have a bed sized quilt that I have hung in my booth for the last 3 weekends. It is very heavily quilted, so  much so that it took me nearly a month to complete JUST the quilting part on my small machine. I could only work on it a bit at a time because shoving that huge quilt through the 7" throat on my machine started giving me back and shoulder problems. I have a $400 price tag on this quilt, and to me, because I know how long it took and what I went through to finish it (and the fact that for fabric and batting alone to make it I paid over $200), it is worth even more than that. I have people who look at this quilt, comment on how gorgeous it is and how much work it must have taken to make something so lovely. Then they look at the tag and make an audible gasping noise.

Don't get me wrong. I know that most people cannot afford to spend that kind of money on a covering for their bed. What I want to know is, why is it okay for an artist who paints or sculpts to charge thousands of dollars for their work and no one bats an eye? Is painting more difficult than quilting, or is it just considered a higher art form? Maybe a person cannot afford $4500 for a painting or sculpture, but they certainly don't guffaw in the artists face and insult them by asking "why does this cost so much?" in a condescending tone of voice. It is expected that "art" costs a lot. So, is quilting not an art? Because to me and many other people who quilt, it absolutely is. It is a passion. It costs time and money. We put our heart and soul into these quilts. How are they any less artistic than splatters and colorful streaks on a canvas? (For the record, not talking down to painters, sculptors, or artists of any sort. All art is derived from a passion in the artist, and ALL art should be viewed as such.)

This goes beyond quilts as well. Anything handmade seems to be viewed as being less valuable. I had a sling bag that I made for last weekends market and a lady walked by multiple times, looking at it. I had a price tag on the bag. If she didn't want to pay what I was asking, she could have said nothing and moved on. Instead, she clears her throat and says very loudly "I just love this bag. It really is very pretty, and all the pockets are great. But really? I can't see $50 for this." and proceeded to walk away.

Why can't people be nice? I understand thinking someone's prices are more than you're willing to spend. I've been there. But I would never go out of my way to make that person feel like their work or their time is not valuable to anyone.

I have met some very nice people during my time at the market so far. I don't plan to let a few people's comments stop me from going and putting my work out there. I will continue to promote my work and I will continue to charge what I believe to be a fair price. I'd be lying if I said those things didn't upset me, but you have to shake it off and move on. This is probably something that every quilter/crafter/sewist experiences from time to time. I just wish there were a way to make people see what goes into what we do, and we could get away from the 'handmade = cheap' stigma.

On a brighter note, I am taking this weekend off and going on a camping trip with my family. I really need some down time and it will be a much deserved break! Next week though, I will have a post with some pictures because OH MAN have I ever been busy!

Monday, May 21, 2012

Out With the Old, In With the New


I've had this quilt for a long time. I made it around the beginning of 2011 and it has always been one of my favorite quilts. It has been sitting in my studio, awaiting the day it would be sent to a new home. Finally, last week, it sold. I was happy to have sold it, I mean that's why I made it. But it really was kind of a bittersweet moment wrapping it up and putting it in the box. The lady who bought it is giving it to her daughter-in-law who is a photographer. She plans to use it as a backdrop for her photos! So that's exciting!

Now that something old has gone, I have some new things to share as well.

Our neighborhood has a huge annual yard sale. It was absolutely the craziest thing I've ever seen. People were BBQ-ing, selling nachos, popcorn, drinks... It was like a 3 block long street fair. It was supposed to start at 8:00am and there were people here at 7:00am trying to go through our garage as we were setting up. You couldn't even drive down our street, it was so packed with cars. I went to one of the neighbors sales and saw a sewing table. You know, the kind that has the drop down shelf for your machine to sit on? I measured it, and measured my sewing space. I almost didn't go back but at the end of the day I went down and it was still there. I decided then that it was meant to be mine. I spoke to my neighbor who told me the table belonged to her mother and she also had a Bernina. I gave her $20 (that's right, I said $20) and took it home.


It is absolutely a perfect fit. It was made for my room! There is another drop down for a serger too, but since I don't have one my hubby is going to make a little piece to fit in there so it covers the hole and makes extra table surface.

Also, I've been making all kinds of little zipper pouches the last couple of days. I really like how they're turning out. I have a feeling these will be my go to gifts for Christmas.


Thursday, May 10, 2012

One For Me

The other day I posted a tutorial for a gardening bucket. After I made one for a mothers day gift, I decided I needed one for myself. This time I used Prince Charming fabric by Tula Pink (my fave!!!) and I made the ties longer so that I could wear the aprons if I chose to.


Here are the two aprons separately. You can see how much longer the ties are in this photo.


Here's how it looks when you're wearing one of the aprons. I think it's the perfect size for wearing when I do craft fairs too! Pardon the no make-up and ponytail pic. I wasn't planning on being in front of a camera today. But I did take a shower so that's a plus =)


And here are both aprons tied around the bucket. I can use them to store my gardening tools, gloves, etc.


I wonder if she'd wear a tiny apron?

Wednesday, May 9, 2012

Swooning (Slowly) Along

You may or may not recall my post awhile ago about the practice Swoon block I made, but I have since cut up all of my Meadowsweet fabrics by Sandie Henderson and have pieced together two of the four blocks I plan to  make. I know 4 blocks doesn't sound like a lot, but each block in this quilt pattern is a whopping 24" square!

I'm not super happy with the first one. There isn't quite enough contrast between the two fabrics to make the pattern really stand out. I like how the second one turned out much better.

It was a bit on the windy side here today, so getting this picture was more difficult than you might imagine.


If you really want to be inspired to take the plunge and start one of these beautiful quilts, check out this Flickr group for some serious eye candy!

Friday, May 4, 2012

A New Tie for a Handsome Guy

My son Ben is 6 years old. He is fascinated by men who wear suits and ties. Think Barney. If you watch 'How I Met Your Mother" you know what I'm talking about. (Not the giant purple dinosaur...) Anyway, I found a tutorial recently on how to make a tie for your little guy HERE. I let him choose the fabrics he wanted - he chose 5. I said "do you want a patchwork tie?" and he said "no. I want 5 ties." Okay then. Lemme see if I can figure out how to make just one first.

I printed out the free PDF pattern (it's 3 pages, but only a few lines per page so it's super light on ink usage) and got the fabric ready. Within literally 30 minutes, I had this:

The hardest part was turning it right side out. That took a good 7 minutes and a few swear words.

I then attached the strap with velcro to go around his neck by tying the tie  around it. When he got home from school he was SO excited to try it on. He does look pretty handsome, if I do say so myself =)


Thursday, May 3, 2012

Gardeners Bucket Apron Tutorial

Alright folks. Here it is... my first tutorial! I was trying to come up with a clever Mothers Day gift and I thought I'd share with all of you how to do it. If you know a special lady who loves to garden, this would make a great gift.

Here is what I'll be showing you how to make:

This tutorial is VERY picture heavy. I wanted to be as thorough as possible so you could end up with a finished project without frustration =) You will basically be making two separate aprons for this project.

The supplies you'll need to get started are as follows:

-A 5 gallon bucket (I picked up one at  my local hardware store for about $5)
-1 yard each of a main focus fabric and a contrasting fabric
-thread
-pins
-sewing machine (if you have a walking foot for your machine I highly recommend you use it for this project. If not, pin like crazy.)
-chalk pencil or something to mark on fabric that will wash out
-ruler

1. From your main focus fabric, you need to cut:

-2 pieces measuring 17.5" x 13.5"
-1 piece 22" x 17.5" (pocket #1)
-1 piece 15" x 17.5" (pocket #2)
-1 piece 11" x 17.5" (pocket #3)

2. From your contrasting fabric, you need to cut:

-2 pieces measuring 17.5" x 13.5"
-3 2.5" x 13.5" strips
-3 2.5" x WOF (width of fabric. Fold fabric in half from selvedge to selvedge) strips
-2 3" x WOF strips


This is my main focus fabric. Pictured are the two pieces 17.5" x 13.5" that I cut.

3. For the 3 pocket pieces you cut, you need to fold each of them in half lengthwise, wrong sides together, and press along the fold. After you've done that your pockets should look like this:
4. We now need to add a contrasting binding to the top (folded edge) of all 3 of your pockets. For these, you will use the 3 2.5" x 17.5" strips you cut from the contrasting fabric.

To make the binding, take one strip and fold (wrong sides together) in half lengthwise, and press:
After you've pressed it, open it up again. You see the line inside?
Now take the top edge and fold it down to that line. Press again.

Repeat this step with the bottom edge.
Now, fold in half and press yet AGAIN =)
5. You are ready to stitch this strip to the folded edge of your pocket. Slip the edge of your pocket inside the fold of the binding and pin.
 Stitch carefully along the edge of the binding.
Repeat this process 3 times, until all of your pocket pieces have the edges bound.

5. When step 4 is complete, you need to layer the pocket pieces on top of the large 17.5" x 13.5" pieces of your main fabric.

You will notice one has two layers of pockets. You can have as many or as few pockets as you want. This is just how I chose to configure them. Play around with the design to see what works best for you. As you can see, I also have pictured above, the large 17.5" x 13.5" pieces of contrasting fabric. These will be the backside of the bucket apron. Turn the contrasting fabric so the wrong side is facing up (toward you) and set your main fabric with pockets on top. Like this:
6. Pin the layers together to avoid having them shift around while you are marking your stitch lines.

To mark my stitch lines for the pockets I used a chalk pencil and a large acrylic ruler.
 You'll want to measure how far apart you want your pockets to be. They do not all need to be the same size. Above, you can see I measured in 6 inches. I made a small mark, and moved my ruler up a few inches more. Then I measured in another 6 inches and made another mark.
 Now, here I am turning my ruler vertically to "connect the dots" I made. This will ensure you get a straight stitching line. I repeated this until I had my desired amount of pockets.

Now, this is where the walking foot on your sewing machine will come in very handy. It helps to feed the top and bottom layers evenly through your machine to prevent bunching.
7. In this picture you can see my chalk line. I just follow the line as I'm stitching along.

Once you have stitched over all of your lines, your piece should look like this:
You also need to stitch a line JUST ABOVE the top of the lower pockets. Otherwise, your top layer of pockets will be way too deep.
Repeat steps 5 through 7 for your second pocket apron.

8. Now we need to make the binding that will go all around the 3 outside edges of each pocket apron. If you are a quilter like me, you may not need to follow along for this step, but I took pictures of this process for my non-quilty friends too.

Take the 3 pieces of contrasting fabric you cut that measure 2.5" x WOF. To make the binding, you need to sew all three of these pieces together, end to end like this:
 Place 2 strips, right sides together, on top of each other like you see in the picture above. It should look like a giant, upside down "L".
Stitch the 2 pieces together at a 45 degree angle. YOU MUST do it exactly as pictured above or you will have to take your stitches out and start over. After they are stitched together, your strip should look like this:
 You then want to trim the excess fabric and press the seam open:

Repeat this step again to add the 3rd strip. When you are done, you should end up with a very long strip of fabric. We now take that very long strip of fabric and fold it in half, wrong sides together, lengthwise, and press all the way down. You should now have this:

9. Time to attach the binding around the outer 3 edges of the pocket aprons (we are leaving the top open for now).
Working on the backside of your pocket apron, line up the RAW edge of your binding strip with the RAW edge of pocket apron #1. See where my thumb is there? That should be the folded edge of the binding.

Using 1/4 inch seam allowance, begin at the top and begin stitching down the edge. When you get about 1/4" from your first corner STOP. This is where it feels a bit like making origami...
 Lift your sewing machine needle and presser foot. Pull the fabric out just enough so that you can maneuver and fold the binding a bit. First, you want to lift the binding up and make a 45 degree angle fold as shown above. Then, you fold the binding back down on top of the 45 degree fold... Clear as mud, eh?
Starting at the corner, put your fabric back under the needle and sew in a few stitches at a 45 degree angle. Then turn, and continue stitching straight down until you get to the next corner. Should look something like this:
Trim any excess fabric you may have (like I clearly did in the above photo). Your seam should be 1/4" all the way around. After you've got the binding attached to the back of pocket apron 1, you will have a long tail of binding left on the end. Trim it off. You will use this to bind pocket apron #2. Now repeat this step with pocket apron #2 and we're almost done, I swear.

10. It's now time to fold the binding over to the front and stitch it down. Turn your work over so you are looking at the main focus fabric (the side with the pockets). Fold the binding up and over that edge:
 Press it down with your iron and pin in place. When you get to the corners, fold them over like this:

Now that you have it all pinned down on the front side, take it back to your machine and carefully stitch along the edge of the binding.

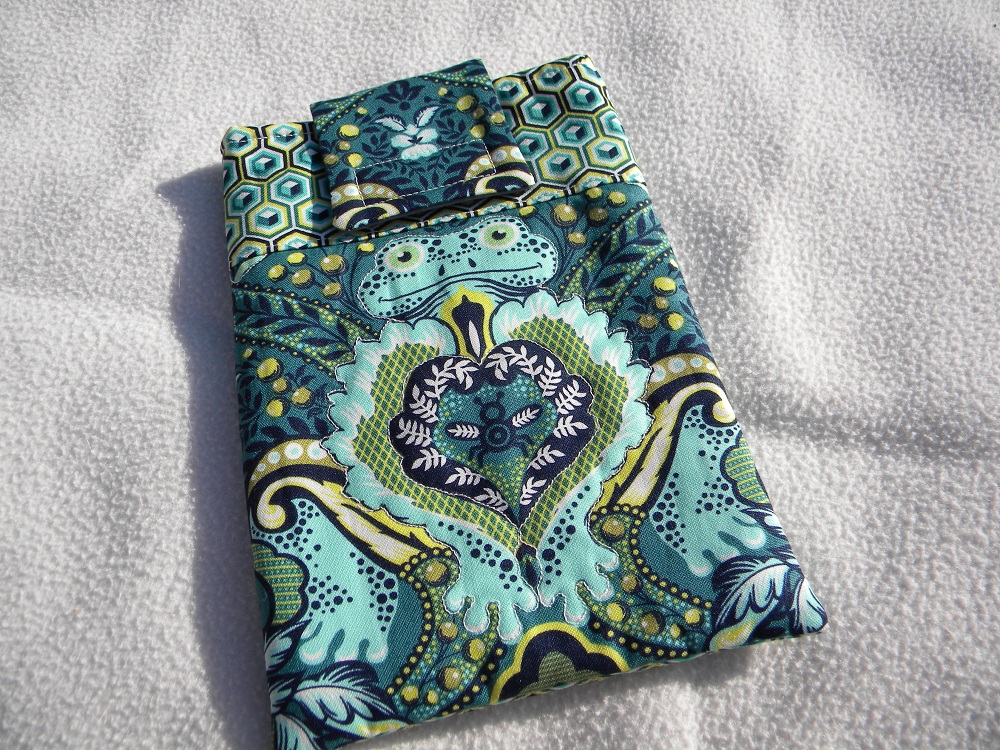
 When you are finished, you should have 2 pocket apron pieces that look like this:
11. For the straps that tie these pocket aprons onto the bucket, we are going to use our last two pieces of fabric you cut, which are the 3" x WOF strips from the contrasting fabric. 

Remember back in step 4, when we made the pocket binding? We are basically doing the same exact thing here. The only difference is that you will need to fold in both ends of each strip about 1/2" like this:
After you have folded and pressed and made, what looks like two really long pocket bindings... slip the unfinished top of pocket apron #1 into the first tie. You want it to be centered so the tie hangs off both sides.
Then, starting at one end, stitch down the entire length of the tie to the other end.

Stitch those little ends shut too like I did in the photo just above. Repeat for pocket apron #2.

12. THE LAST STEP! YAY!

All of your sewing, cutting, measuring, folding... that's all done. Now we just need to tie a couple knots.
Grab your 2 pocket aprons and your bucket. Wrap the aprons around the bucket (one on one side, another on the other side). Use the ties to make a knot - tie it tightly or it won't stay up once you pile all your garden tools in - on either side. I needed an extra pair of hands for this part so I enlisted one of my kids to assist.
Voila! Here is your finished gardeners bucket! You can give it as is, or fill the pockets with gardening tools. I'll also be putting a beautiful flowering plant in the bucket itself before I give it.

All of the pictures and steps can seem intimidating, but I made this project start to finish in just a few hours time. And that includes the time it took taking all the photos, writing steps down as I went along, and leaving for a bit to pick up my kids from school =)

Please let me know if you have any questions or if any steps aren't as clear as they should be. As this is my first tutorial I wouldn't be surprised if I skipped a necessary photo or two. Also, if you make this project, I would love to hear from you to see how it turned out!